Embroidering a T-shirt can be an incredibly creative and rewarding experience. With the right materials and tools, it’s not that difficult. In this article, I will show you what you need and how to proceed step-by-step to embroider your own T-shirt. Whether you're a beginner or have some experience, this guide will help you achieve great results.
Materials and Tools
Before you start embroidering, make sure you have the following materials and tools ready:
- Embroidery machine: A reliable machine is the foundation of your work. There are many models on the market, from simple to highly complex machines. For beginners, a standard single-needle embroidery machine is definitely sufficient.
- Embroidery hoop: Choose the appropriate hoop for the size of your design. Embroidery hoops come in various sizes and shapes. Always choose the smallest possible hoop for the design to minimize distortions.
- Embroidery needles (75/11): These are ideal for light fabrics like cotton. Needles are available in different sizes, and it’s important to choose the right needle for your fabric.
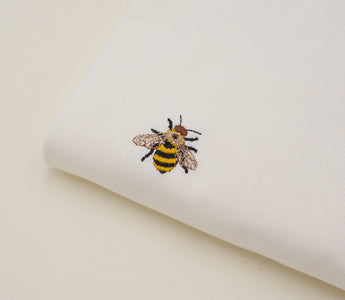
- Embroidery thread (Polyester or Rayon, 40 weight): These materials are durable and colorfast. They are available in many colors, allowing you to let your creativity run wild.
- Stabilizer (Cutaway): Prevents the fabric from distorting. Stabilizers come in different weights and types. They are a must for any embroidery project.
- A cotton T-shirt: Cotton is particularly suitable. However, you can also use other fabrics depending on the look you want to achieve. The fabric should have a minimum weight of 180 gsm. If possible, prefer a weight of 220 gsm or higher.
- Bobbin thread: Alternatively, you can use regular embroidery thread. Bobbin thread is important to ensure even stitch quality.
- Scissors: For cutting thread and stabilizer. A good pair of embroidery scissors should always be at hand.
- Embroidery file: The design you want to embroider. You can buy ready-made designs or create your own.
- USB stick: To transfer the embroidery file to the machine. Make sure the USB stick is compatible with your embroidery machine.


Step by Step
Step 1: Select and Transfer Design
Select an embroidery design that suits your T-shirt. You can use templates from the internet or create your own designs. Download the embroidery files to your computer and save them on a USB stick. For a detailed guide on creating embroidery files, read our blog post How to Convert Images, Photos, and Graphics into Embroidery Files.
Step 2: Prepare the T-shirt
Wash and iron the T-shirt to ensure it is clean and smooth. Cut the stabilizer to the size of the embroidery area and attach it to the inside of the T-shirt. Use cutaway stabilizer to prevent distortion in clothing.
Step 3: Set Up the Embroidery Machine
Set up your embroidery machine by loading the desired embroidery pattern. Select the right embroidery needles and use polyester or rayon embroidery thread. Make sure the thread tension is set correctly to achieve even stitches.
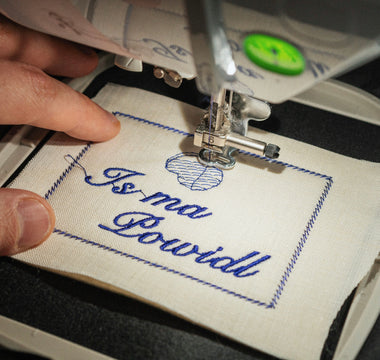
Step 4: Embroider
Start embroidering by starting the embroidery machine. Make sure the T-shirt stays smooth and does not distort during embroidery. Monitor the embroidery process and pause occasionally to ensure there are no wrinkles or distortions in the fabric.
Step 5: Final Touches
Carefully remove the embroidery hoop from the machine. Trim the excess stabilizer around the design and remove any loose threads. Iron the T-shirt on the back of the embroidery at a low temperature and place a cloth between the iron and the fabric.
Step 6: Caring for Embroidered Clothing
Always wash the embroidered T-shirt inside out and at low temperatures (max. 30°C). Avoid heavy rubbing and direct ironing on the embroidery to preserve the colors and structure. Use mild detergents and avoid bleach.


FAQs
Can I embroider any T-shirt?
Yes, but T-shirts made of cotton or other stable fabrics are best. Light and stretchy fabrics can be more challenging to embroider and require more experience and possibly special stabilizers.
How long does it take to embroider a T-shirt?
The duration depends on the design and size of the embroidery pattern. Small and simple designs can take only a few minutes, while large and complex patterns can take several hours. Allow enough time and take regular breaks to achieve the best results.
Do I need special needles for the embroidery machine?
Yes, embroidery needles are specifically designed to work with embroidery thread and create clean stitches. Use size 75/11 embroidery needles for light fabrics like cotton and 90/14 for heavier fabrics like denim. It’s important to change the needles regularly to maintain consistent stitch quality.
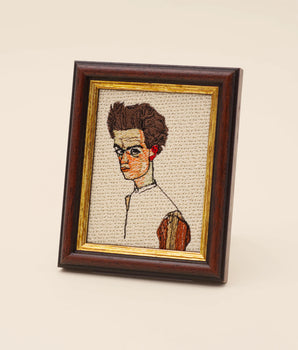
Can I embroider multicolored designs?
Yes, modern embroidery machines allow you to embroider multicolored designs. You need to change the thread colors according to the design. Many machines have features that indicate when to change the color, and some can even handle multiple colors at once.


Summary
Embroidering a T-shirt requires a bit of preparation and the right tools. With a good embroidery machine, the right hoop, suitable needles, and high-quality thread, you are well equipped. In this guide, I have explained step-by-step how to select and transfer a design, prepare your T-shirt, and set up the embroidery machine. Additionally, you learned how to carry out the actual embroidery process and perfect your project in the final touches. Finally, I provided some tips on how to care for your embroidered clothing to ensure you enjoy it for a long time. Whether you are a beginner or have completed several projects, with these tips, your next T-shirt will surely be a standout!


![Personalisiertes Unisex-T-Shirt mit gesticktem japanischen Wunschtext, erhältlich in 7 Farben, Classic und Oversized Fit [MOT]](http://keomakindl.com/cdn/shop/files/custom-tshirt-embroidery-your-text-japanese-colors.webp?crop=center&height=350&v=1776698323&width=298)
![Personalisiertes T-Shirt in Weiß mit japanischem gesticktem Text – Detailaufnahme der Stickerei [MOT]](http://keomakindl.com/cdn/shop/files/tshirt-overview-personalized-custom-japanese-text-detail.webp?crop=center&height=350&v=1776698323&width=298)


