Embroidery has adorned textiles for centuries, evolving from hand stitching to machine techniques, combining artistry with digital precision. Machine embroidery, a craft that may seem intimidating at first glance, is a rewarding skill that enhances fabrics with vibrant designs and textures. This comprehensive guide aims to equip you with the knowledge and confidence to start your embroidery projects, transforming blank textiles into personalized masterpieces.
Understanding Machine Embroidery
At its core, machine embroidery involves using a specialized machine to sew designs onto fabric. Unlike traditional sewing machines, embroidery machines can create complex designs with multiple colors of thread, offering a vast playground for creativity. Here is a detailed breakdown of how it works:
Choosing and Modifying a Design
Start by selecting a design. Beginners can use pre-made patterns, which are often available as embroidery files online. These files come in various formats like PES, DST, or JEF and need to be compatible with your embroidery software. If you want to create your own design, you can use software like Wilcom or Hatch to digitize and adjust your image. Ensure the design has simple, clear outlines and uses few colors. Complex designs with many details are harder to digitize and may not translate well into embroidery.
Preparing Fabric and Machine
Choosing the right fabric is crucial for the outcome of your embroidery. For beginners, cotton or polyester fabrics are ideal as they are sturdy and work well with most embroidery machines. Place the fabric in the embroidery hoop and stretch it tight to avoid wrinkles. A stabilizer is applied to the back of the fabric to support it during embroidery. There are different types of stabilizers: tear-away, wash-away, and cut-away. Choose the appropriate stabilizer based on your fabric and design.
The Embroidery Process
Once the fabric is prepared and hooped, attach it to the embroidery machine. Select the design on the machine and ensure all thread colors are ready. Modern embroidery machines switch colors automatically, but it’s important to monitor the thread changes to ensure no errors occur. Start the machine and watch the embroidery process, intervening if necessary. After the embroidery is complete, carefully remove the hoop and stabilizer from the fabric.

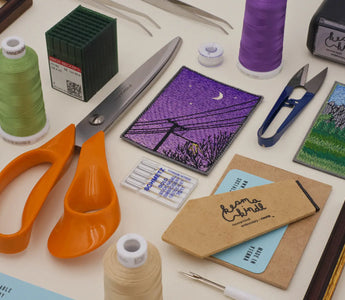
Essential Tools and Materials
To begin machine embroidery, you need some essential tools and materials. Here are the basics you should know:
Embroidery Machine
The embroidery machine is the heart of your setup. For beginners, models that are easy to use yet versatile are ideal. Well-known brands include Brother, Janome, and Bernina. These machines offer various stitches, automatic thread cutters, and color changes that make the embroidery process easier. Make sure to choose a machine that fits your needs and budget.
Embroidery Hoop
The embroidery hoop holds your fabric taut and in place while the machine works. Hoops come in different sizes to match the various projects you might embroider. A good hoop prevents wrinkles and ensures even stitches.
Threads
Embroidery threads come in many colors and materials. Polyester and rayon threads are the most popular for their strength and sheen. Polyester is more resistant to fading and ideal for frequently washed garments, while rayon offers a beautiful shine perfect for decorative embroidery.
Stabilizers
Stabilizers are essential to support the fabric during embroidery and prevent it from puckering. There are different types of stabilizers:
- Tear-away stabilizers: These are torn away after embroidery. They are ideal for light to medium-weight fabrics.
- Wash-away stabilizers: These dissolve in water after embroidery and are perfect for sheer or delicate fabrics.
- Cut-away stabilizers: These are trimmed away after embroidery and provide maximum stability for heavy fabrics.
Choose the appropriate stabilizer based on your fabric and design.
Fabrics
Almost any fabric can be embroidered, but for beginners, smooth, tightly woven fabrics like cotton or polyester are ideal. These fabrics are easy to hoop and provide a good foundation for even stitches. Avoid stretchy fabrics like jersey until you gain more experience.

Practical Tips for Beginners
Starting your first machine embroidery project can be exciting but also a bit overwhelming. Here are some tips to ease the process:
Start Simple
Begin with simple designs and small projects to build confidence and skills. Avoid complex patterns and opt for basic shapes and clear outlines. Such designs are easier to embroider and give you a feel for the process.
Practice on Scrap Fabric
Test your design on a similar piece of fabric before moving to the final piece. This helps you find the right settings for the machine and the appropriate stabilizer. You can correct mistakes and ensure the design looks good before applying it to your final project.
Understand Your Machine
Take time to learn your machine’s capabilities and maintenance needs. Read the manual carefully and familiarize yourself with the various functions. Knowing how to troubleshoot common problems saves time and frustration. Clean and maintain your machine regularly for optimal results.
Join a Community
Online forums and local craft groups can be invaluable resources for advice, inspiration, and support. You can learn from others' experiences, ask questions, and discover new techniques. Communities like these often offer free designs and tutorials that can help you expand your skills.

Project Ideas for Inspiration
Now that you are equipped with the basics of machine embroidery, here are some project ideas to spark your creativity:
Towels
Add a personal touch to kitchen or bath towels with monogrammed initials or decorative borders. Use water-soluble stabilizers to ensure a clean back. Towels are a great way to try out simple designs while creating useful items.
T-Shirts
Decorate plain T-shirts with unique designs or quotes to reflect your personality or create thoughtful gifts. Follow the rule: "If you wear it, don't tear it." This means using a stabilizer that doesn't tear away easily, as tearing could distort the fabric. Instead, use a cut-away or wash-away stabilizer that supports the stretch fabric without compromising its structure.
Pillows
Transform ordinary pillows into statement pieces with intricate patterns or thematic designs. Pillow covers are easy to embroider and offer a large area for creative designs. Use tear-away stabilizers to achieve a clean finish.
Children's Clothing
Children's clothing provides a wonderful canvas for colorful and playful designs. Embroider T-shirts, jackets, or even pants with fun motifs and characters to create unique garments that kids will love.

Introduction to Digitizing for Beginners
Digitizing embroidery files is not just for professionals. With the right approach, beginners can successfully create their own designs. Here are the basic steps:
Choosing an Image
Select a simple image with clear outlines and few colors. Such images are easier to digitize and look better in embroidery. Avoid images with many details and gradients, as these are difficult to translate into embroidery patterns. Ideally, the image should have a resolution of at least 300 DPI to capture the details better.
Introduction to Software
Use beginner-friendly software like Hatch by Wilcom or Embird. These programs offer intuitive interfaces and many helpful tutorials for beginners. They allow you to import, edit, and convert your image into an embroidery file. Many of these programs offer trial versions you can test before committing to a purchase.
Tracing the Image
Start by tracing the image's outlines. Most software solutions offer automatic tools to simplify this step. You can manually adjust the outlines for more precise results. Use path tools to create the contours of your design. This is a crucial step, as the quality of your tracing determines the quality of the final embroidery file.
Choosing Stitch Types and Colors
Select appropriate stitch types and colors. Experiment with different options to see which best suits your design. Remember to adjust the stitch density to match the fabric type. Satin stitches work well for outlines, while fill stitches are ideal for larger areas. Ensure the color palette matches the available thread colors on your embroidery machine.
Running a Test Stitch
Before starting your final project, run a test stitch on a similar fabric. This helps you identify and correct any issues and make adjustments. Test the stitch density, colors, and stabilizers to ensure everything works well together. A test stitch also helps you determine the correct size and placement of the design.

Downloading and Editing Embroidery Files
Downloading Embroidery Files
Embroidery files can be downloaded online from various websites and marketplaces. There are many free and paid designs available in different formats. Make sure you select the correct file format for your embroidery machine. Popular sites for embroidery files include Urban Threads, Embroidery Library, and Etsy. You can search for specific designs or browse by category.
Required Programs
Downloading and transferring embroidery files to your machine generally doesn't require special software. Most embroidery files are available in common formats like PES, DST, or JEF that can be loaded directly onto the embroidery machine. However, if you wish to edit or customize the designs, you will need software like Wilcom, Hatch, or Embird. These programs offer extensive editing tools and can help you tailor the designs to your exact specifications.
Using a USB Stick
To transfer embroidery files to your machine, you can use a USB stick. Format the USB stick to the FAT32 file system to ensure it is recognized by the embroidery machine. Save the downloaded embroidery files onto the USB stick and insert it into the appropriate port on your machine. Some embroidery machines also offer wireless transfer options if your machine and software support this feature.
File Formats and Compatibility
Embroidery machines use different file formats depending on the brand and model. The most common formats include PES (Brother), DST (Tajima), JEF (Janome), and EXP (Melco). Check your embroidery machine's manual to determine the correct format and ensure the file is compatible. Some machines support multiple formats, while others are restricted to a specific format.
Editing Embroidery Files
If you wish to edit embroidery files, you will need specialized software like Wilcom, Hatch, or Embird. These programs allow you to modify designs, change colors, and adjust stitch density. Note that not all designs can be edited easily, especially those that are copyrighted. You can, for example, resize a design without compromising stitch quality or add or remove elements.
Tips for Beginners
For beginners, it is recommended to start with simple designs to get a feel for the process. Practice loading and transferring files as well as setting up the machine before attempting more complex projects. Use online communities and tutorials to expand your skills and find inspiration. Many websites offer step-by-step guides and videos to help you better understand the process.
Frequently Asked Questions (FAQs)
How do I choose the best design for my first embroidery project?
Choose simple designs with clear outlines and few colors. Such designs are easier to digitize and embroider, which is especially important for beginners. Make sure the design doesn't have too many fine details or gradients, as these are harder to translate. Simple geometric shapes or basic silhouettes are ideal.
Which software is best for beginners?
Beginner-friendly software like Hatch by Wilcom or Embird is ideal. These programs offer intuitive interfaces and many helpful tutorials. They allow you to create, adjust, and digitize designs. Both programs offer trial versions you can test before committing to a purchase.
Do I need special software to download embroidery files?
No, you don't need special software to download embroidery files. Most designs are available in formats like PES, DST, or JEF that can be loaded directly onto embroidery machines.
How do I format a USB stick for an embroidery machine?
To format a USB stick for an embroidery machine, use the FAT32 file system. Connect the USB stick to your computer, right-click on it, and select "Format." Choose FAT32 and click "Start." Backup any files, as this process will erase all data.
Can I edit embroidery files?
Yes, embroidery files can be edited with specialized software like Wilcom, Hatch, or Embird. These programs allow you to modify designs, change colors, and adjust stitch density.
Which file formats do embroidery machines use?
Embroidery machines use different file formats depending on the brand and model. The most common formats include PES (Brother), DST (Tajima), JEF (Janome), and EXP (Melco). Check your embroidery machine's manual to determine the correct format.
Where can I find embroidery files to download?
Embroidery files can be found on various websites and marketplaces, both free and paid. Make sure to choose the correct file format for your embroidery machine.
How do I test an embroidery file before applying it to my project?
It is advisable to test the design on a similar scrap fabric first. This ensures that all settings are correct and the design looks good before applying it to the final project.
Why is a stabilizer important in embroidery?
A stabilizer prevents the fabric from puckering or distorting during embroidery. It ensures that the stitches are even and the design is precise. Choose the appropriate stabilizer for your fabric and design.
Can I convert any image into an embroidery file?
Not every image is suitable for direct embroidery. Complex images with fine details or gradients often need to be simplified. Clear outlines and contrasting colors are best for digitizing. However, with the right software and adjustments, most images can be successfully digitized.
How long does the digitizing process take?
The time required for the digitizing process varies depending on the complexity of the design. A simple design can take a few hours, while complex patterns can take several days. Experienced digitizers can work faster, but precision is crucial.

Conclusion
Machine embroidery opens up a world of creative possibilities. With each project, you will discover new techniques and challenges that will further develop your skills. Remember, patience and practice are key to success. Experiment with different designs, fabrics, and techniques to find your style and fully unleash your creativity. So grab your embroidery hoop, choose your threads, and start your next embroidery project—the journey to impressive and unique embroideries begins now. Happy embroidering!


![Personalisiertes Unisex-T-Shirt mit gesticktem japanischen Wunschtext, erhältlich in 7 Farben, Classic und Oversized Fit [MOT]](http://keomakindl.com/cdn/shop/files/custom-tshirt-embroidery-your-text-japanese-colors.webp?crop=center&height=350&v=1776698323&width=298)
![Personalisiertes T-Shirt in Weiß mit japanischem gesticktem Text – Detailaufnahme der Stickerei [MOT]](http://keomakindl.com/cdn/shop/files/tshirt-overview-personalized-custom-japanese-text-detail.webp?crop=center&height=350&v=1776698323&width=298)


